My Original Home Studio
- Feb 14, 2019
- 11 min read
Updated: Apr 14, 2025
I love my new home studio!
Goodness knows, it was a marathon—not a sprint—to get my environment to the point where I could produce amazing audio! As a matter of fact, it was at least two major building revisions of my studio to finally get it there. Since then, it has remained impressively stable and dependable. I owe a debt of gratitude first and foremost to my dad, who built my studio from scratch, and secondly to my amazing studio consultant, George Whittam. I have had many questions from people throughout the years about my studio, so I thought I would document the process so that it may help others who may be considering building their own booth.

Spending time with family is always a blast, and last month, I was lucky enough to have my parents stay with us for all of February. Anyone who knows my dad knows he can't sit still and is super handy to have around! Growing up, he was always drawing up plans, knocking down walls, and building stuff, especially around our house. If something was broken, my dad could definitely fix it. So, I knew I had to find some projects to keep him busy for the month, and upgrading my home studio seemed like the perfect idea!
Back in 2009, my dad designed and built my home studio in just two days, and we both learned a ton from that experience. When he headed home, we both knew there were more improvements we could make to the booth, inside and out, once I had the funds. Well, now was the time, and I was super pumped to get started!

Enhancing Studio Acoustics with Expert Guidance from George Whittam
I wanted to make sure my studio upgrade had the best sound possible, so I got help from the home studio expert, George Whittam. It was a great move, and I'd totally recommend it to anyone wanting to up their studio game! Before he came over, I sent George some pics from when the booth was first built so he could get a feel for the setup.
George dropped by my place and had some great ideas for improving the booth's setup. It was perfect timing since there was a lot of construction noise nearby, so he got to hear the worst of it. While he was there, he also tweaked my equipment settings to cut down on background noise and set up custom filters for both my Pro Tools and Twisted Wave software. Hanging out with George was awesome, and I learned so much. Big thanks to George for all his amazing help and support!

Enhancing Sound Isolation: Booth Improvements to Minimize External Noise and Vibrations
After jotting down all of George’s ideas for improving the booth, I was all set to fill my dad in on the details. We came up with a plan to lift the booth off the ground using hockey pucks. This way, we could cut down on low-frequency vibrations from the heavy construction gear outside and the noise from loud cars and trucks that occasionally drove past my place.
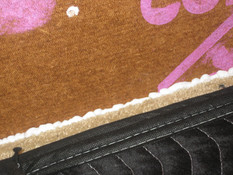
We'll also make sure to seal and caulk the existing ceiling to the top of the booth, since right now it's just resting there. Plus, we'll cover the existing fiberboard exterior walls with drywall to cut down on outside noise. Inside, we'll add some acoustic material to enhance the sound and reduce any room noise.
Our Collaborative Construction Journey
My dad showed up on February 1st, and we were all set to get started! I arranged a video call with George, my dad, and me so we could go over our plans and let my dad ask any extra questions about the construction and material suggestions. During the call, we decided to include a suspended ceiling frame filled with acoustic material to boost the booth's acoustics. My dad dove right in, putting together the materials list, sketching out the details, and basically turning Home Depot and Lowe’s into his hangout spots.

So, right when I got swamped with VO gigs and needed my booth (not complaining!), scheduling the upgrade got a bit tricky. We figured the simplest way was for my dad to build the pieces in the garage and then just put them together upstairs where the booth is. One tricky part was figuring out how to move the booth out of the room's corner to add the exterior walls. But no worries, my dad had it all figured out!
Dad started building a new roof for the booth using insulated QuietRock drywall. This was to replace the flat plywood panels that were just sitting on top of the booth. We attached the new roof to the walls with screws and sealed it up with caulk to keep out any air when I'm not recording.

Constructing a Permanent and Stable Recording Booth Floor
We just put in a new floor for the booth because the old one was literally just some drywall and plywood tossed on the ground—not even attached to the walls. We initially wanted the booth to be easy to take apart in case we needed to move it, but that's not a concern anymore. Now, we're all about making a sturdy booth that stays put in the corner of the room. Since moving it isn't in the cards, we built the new floor in three parts, bolted them together, and secured them to the walls. We had to work on this outside of recording hours because of my crazy schedule, so it'll be a few more days before I can find time to tackle the next part of the upgrade.
Throughout each phase, George had my back. I'd send him audio files after every step to check how effective each upgrade was. His feedback was super helpful and kept us confident that we were on the right track. For testing, Dad put in the floor piece by piece, but we had to wait to secure it to the booth until we could move it to the center of the room and set up the hockey pucks. I could still use the booth for another day before our big upgrade, which was attaching the exterior walls. When I went in to record the next day, the floor wobbled a bit, making the mic stand rock and adding unwanted noise to my recordings. I chatted with George about how to fix it, and he suggested getting a mic boom that could be mounted to the wall to replace the bulky mic stand. This was the perfect solution, giving me much-needed space inside the booth. Problem solved!

Enhancing Studio Acoustics with DIY Suspended Ceiling Installation
My dad jumped right into building the frame for the suspended ceiling, and finally, the acoustic material I ordered arrived! We went with 2” Roxul Rockboard, which is a mineral wool board that's both effective and easy on the wallet. Seriously, wear gloves when handling it because it made me a bit itchy! We cut it to size and doubled it up to 4” in the ceiling. It’s hanging above me using cable ties on J hooks to really enhance the booth's acoustics. Once we got it up, I noticed a huge difference and made sure to send George a new audio sample to get his thoughts.

Walls Go Up
We finished cutting the QuietRock drywall for the garage walls and pre-drilled them to make it easier to put together once we got them upstairs to my studio. I hadn't really considered how the booth would look, but when I saw the plain pieces, I thought a coat of paint would be a nice addition. Luckily, we had an extra gallon of paint in the garage that matched our walls, so we used that. We figured it would be easier to paint the drywall in the garage rather than waiting until it was upstairs. With my painting skills, that was definitely the smart move!

Innovative Soundproof Booth Door Design for Enhanced Safety and Functionality
My dad kept working on the booth in the garage until we could find a day to do the big upgrade. He came up with a new door design that would totally cover the door opening by swinging from the right outside wall, making sure no sound could sneak in. He also wanted to figure out a new handle that would let you open and close the booth door from both inside and outside at the same time. Right now, my studio setup has door latches, with one on the inside and one on the outside.
He was worried about the inside lock and my safety in case something happened and I couldn't get out. (Gotta love him for thinking of that!) So, he came up with one of the coolest custom door handles I've ever seen, made just for me, and I totally love it! The door was built with quiet rock and insulation, and ended up weighing around 100 lbs—like a vault door! It needed three heavy-duty hinges to hold it up.

It's Installation Day!
We needed some serious muscle to shift the booth, put up the outer walls, move it back, and finish off the acoustic panels inside. My husband teamed up with my dad on Saturday morning to help out. Before moving it, we took out the temporary floor to make things easier and placed hockey pucks under the structure in just the right spots. My dad had this great idea to use some 1x4’s to slide it on and pull it out of the corner with a rope. It worked perfectly!
Wait - it's too heavy,...
Feeling relieved, we got all four exterior walls secured and touched up the paint. Then it was time to move it back to its permanent spot. Since moving the booth before installing the quiet rock was so easy, we didn't think we'd run into any problems moving it back. Boy, were we wrong. The quiet rock walls, weighing 2.1 lbs per square foot, added about 300 lbs to the whole setup.

My dad and husband gave it their all, but the booth wouldn't move an inch! In a bit of a panic, I called my neighbor, but he wasn't home. I tried contacting everyone I could think of, but no one was free. So, what now?
I got so fed up that I decided to jump in and help push the booth too—there was just too much on the line to give up! Thankfully, having a third person was exactly what we needed, and the booth moved back into place like a charm! I can't help but feel thankful whenever I think about it—our family coming together is what really made it happen! It just makes me smile!

After we set up the booth, we used a crowbar on each side to lift it a bit and slid some hockey pucks under the outside walls. We did ding the drywall a little, but a piece of molding will easily cover that up. Inside, we placed the pucks directly on the carpet, spacing them out to support the booth floor. We stacked two layers of plywood and a layer of quiet rock on top. Then we assembled the floor framework in three sections, connecting and bolting them to the side walls for a super sturdy floor. We added insulation in the framing, another plywood layer, and some carpeting. Just like that, our floor was done, with the whole booth resting on 31 hockey pucks to help keep noise from coming up through the floor. (By the way, we got an awesome deal on those pucks at Hockey Giant in Anaheim!).

Next up was putting the acoustic material inside the booth. Honestly, this was one of the easiest things we did all day. We just attached pieces of the 2” Roxul Rockboard to each wall, securing them with screws and washers under the existing sound blankets. The mineral wool is super easy to work with and really light—though it can be a bit itchy if you touch it directly! I was really happy to have the heavy-duty sound blankets covering it. Since my booth isn't very big, I made sure to step in afterward to check if I had enough space to move around.
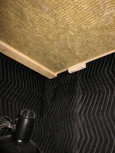
The suspended ceiling was hung using simple cable ties attached to screw eyes in the ceiling. We cut the acoustic panels to fit the ceiling frame and doubled them up for a total of 4 inches of padding above me.
We attached the mic boom to the shelving that already held my equipment. What a difference! I was thrilled—no more clunky mic stand taking up all that space in my booth! Huge thanks to George for the suggestion! It was such a simple fix, but it worked wonders! I had more space than ever, and with the extra acoustic panels, my new setup was wonderfully quiet.
The Best Studio Door Lock Ever!

Next up was getting the new door in place. Like I mentioned before, this door was meant to completely cover the opening and needed to be attached to the right side wall to make that happen. It was insulated and made from quiet rock, so it was way heavier than the old door. We had to use three heavy-duty brackets to hold it up. Once the door was up, we added the coolest, most creative door handle ever.
My dad took the longest time with this part because the handle was custom-made. We couldn't finish it until the door was up, so we could see how it worked and tweak the width if needed. After a few tries and some filing on the external shim to make it smooth, we were done! Honestly, the handle might be my favorite part of the booth. My dad designed it with so much care and love, making sure there was easy access from the outside in case anything happened inside. Before this, I just had a latch that locked from the inside.
Then we noticed some light sneaking through the booth when the door was closed. My dad definitely wasn't having that :) so we made another trip to Lowe’s, or maybe it was Home Depot? Anyway, we got a Wood & Vinyl Clad Foam weather stripping kit, and it sealed the door perfectly. Worked like a charm! The booth was finally done! I quickly made a new set of benchmark recordings to send to George, who said the noise floor and room acoustics were way better.
After that, I decided to glow up the booth's look by adding some molding around the top and door edges. Now it was both super functional and pretty!

A Heartfelt Journey: Upgrading My Studio with Love and Support
My studio upgrade was a wonderful learning experience for both my father and me, and I am so grateful to him for believing in me and for helping me achieve my dreams! Many thanks also to the fabulous George Whittam for all of his invaluable and incredible wisdom and support. My booth stands proudly in my office and represents the ultimate expression of love, heart, and giving. What a beautiful gift it is—it is truly priceless, and I am so very blessed. How fortunate am I to be able to stand in that booth every day and feel love like that?
Thanks a bunch, everyone! I really hope I've been able to help those of you looking to spruce up your home studios by sharing what I've learned. I'd love to hear from you too, so drop your experiences, comments, and suggestions below.
Thanks for reading! - Anne
"Anne Ganguzza's audio quality coming directly out of her booth is astonishingly good. She is sending a very clean signal in a well treated environment. She has a great mic that works well for her, proper mic pre levels with minimal processing and.... well, she's Anne. Whatever you're doing Anne, change nothing." - Cliff Zelman, A-Mazing Demos
Check out the rest of my studio upgrade photos:


Want equipment & gear recommendations?
Want even more recommendations?
Work with Anne
Anne Ganguzza is a Voice Actor, Coach, Influencer, and award-winning Podcaster & Demo Producer. based in Southern California.