"Anne Ganguzza's audio quality coming directly out of her booth is astonishingly good. She is sending a very clean signal in a well treated environment. She has a great mic that works well for her, proper mic pre levels with minimal processing and.... well, she's Anne. Whatever you're doing Anne, change nothing." - Cliff Zelman, A-Mazing Demos
I receive compliments regularly on my custom built home studio since my last upgrade in 2011. Goodness knows, it was a marathon - not a sprint - to get my environment to the point where I could produce amazing audio! As a matter of fact, it was a least two major building revisions of my studio to finally get it there. Since then, it has remained impressively stable and dependable. I owe a debt of gratitude first and foremost to my Dad, who built my studio from scratch, and secondly to my amazing studio consultant, George Whittam. I have had many questions from people throughout the years about my studio so I thought I would document the process so that it may help others who may be considering building their own booth. Please not that most of the audio equipment shown is not my current equipment - which now consists of a Neumann TLM 103 and a Steinberg UR22mkII.
The excerpt that follows is a repost from my main studio upgrade which happened February, 2011
The Studio Upgrade Begins

It’s always wonderful to spend time with family, and this past month, I was fortunate to have my parents come and stay with us for the entire month of February. Now, anyone who has ever met my father knows that he just can’t sit still, and is an amazingly handy guy to have around! Yes, I am a lucky girl. Growing up, he was always sketching plans, tearing down walls, and building and constructing things, especially in and around our home. If it was broken, my Dad could most certainly fix it! I knew I had to find projects to keep him busy for the month, and what better project than to upgrade my home studio? :)
My Dad originally designed and built my home studio in 2009 (in just two days!), and we both learned a whole lot from the experience. When he left to go home, we both knew there were improvements we could make to both the interior and exterior parts of the booth once I had the funding. Well, now was the time, and I was super excited to get started!
Before...

Before…I wanted to make sure I could get the best acoustics possible from my studio upgrade, so I enlisted the services of none other than the master of home studios himself, George Whittam. A great decision on my part, and one I highly recommend for anyone looking to improve their sound and take their studio to the next level! Prior to my on site visit, I sent George the pictures that I had taken from the initial construction of the booth so he could understand the underlying structure.
George then visited me on site and was able to make suggestions for improvements to the physical structure of the booth. It was a great time for him to be at my studio, as there was major construction going on next door and he was able to hear and assess a worst case scenario. During his visit, he also was able to fine tune the settings of my equipment to reduce the noise floor as well as create custom filters for me for both my Pro Tools and Twisted Wave software. It was an awesome experience with George, and I learned an incredible amount. My sincere thanks and gratitude go out to George for such wonderful help and support during the process!
Home Studio Plans

After taking furious notes with George’s booth improvement suggestions, I was ready to brief my father on the specifics. Our plan was to suspend the booth up off the floor on hockey pucks to eliminate as much low frequency vibration that was coming from the heavy construction equipment outside and other noises such as loud cars and trucks that periodically pass by my development. We would also seal and caulk the pre-existing ceiling to the top of the booth, which was currently just sitting on top of the structure. In addition, we would seal the existing fiber board exterior walls of the booth with a layer of drywall to eliminate as much external noise as possible, as well as adding acoustic material to the interior to improve the sound inside the booth and eliminating as much room noise as possible.
Construction
My father arrived on February first and we were ready to start work! I set up a teleconference with George, myself, and my father to confirm our plans and allow my father to ask any additional questions that he may have regarding construction and material recommendations. At this point we agreed to add in a suspended ceiling frame structure which would be filled with acoustic material in order to further improve the acoustics inside the booth. My Dad got busy writing up the bill of materials, sketching the specifics, and making Home Depot and Lowe’s his second home. :)

Of course, it was at this point that I all of a sudden became very busy with VO jobs and needed to use my booth, (NOT complaining at all!) and planning the actual times for the upgrade proved to be a bit trying. We decided that the easiest way to was for my father to essentially build in pieces in the garage, and then simply assemble them upstairs in the existing booth location. One of the challenges was figuring out how to move the booth out of the corner of the room in order to put the exterior walls on! No worries, of course my father had a solution!
Dad began the construction on a new roof of the booth which was constructed with insulated quiet rock drywall. This would replace the flat panels of plywood that currently just rested on top of the booth. We secured this new roof on to the walls with screws and caulked it to seal out any air space during my off recording hours.

A new floor for the booth was then constructed. The previous floor was a simply a few pieces of drywall and plywood that essentially sat on the floor and were not connected to the exterior walls. (Our initial plan for the booth was to be able to easily disassemble it in case we wanted to move it - This was no longer a concern for us, and we now concentrated on building a solid booth that would be permanently located in the corner of the room.) Since we did not want to disassemble the booth, the new floor was constructed into three sections which would then be bolted together and attached to the existing walls. Again, we were forced to do this off recording hours due to my busy schedule. It would be another couple of days before I would be able to schedule the next section of the upgrade.
During each stage, George was there to support me, and I sent him audio files after each step as a benchmark to gauge the effectiveness of each portion of the upgrade process. The feedback I was getting from George was super helpful, and kept encouraging us that we were on the right track. As part of our testing process, Dad installed the floor in sections, however we would have to wait to secure it to the booth until we could move it out into the center of the room and position the hockey pucks in place. I was able to use the booth another day until our scheduled major upgrade, which would be to attach the exterior walls. When I stepped into the booth to record the next day, the floor swayed a bit, which then proceeded to rock the mic stand, :) causing unwanted noise in my recordings. I spoke to George about a solution, and he recommended that I get a mic boom that I could mount to the wall and replace the bulky mic stand. This was the perfect solution, as it would afford me some much needed interior space inside the booth. Done deal!

My Dad then constructed the frame for the suspended ceiling, and my acoustic material finally arrived from the manufacturer! We used 2” Roxul Rockboard, a mineral wool board, that was both effective and economical. I definitely recommend handling it with gloves, as it made me a bit itchy! We cut the material to fit, and doubled it to 4” within the ceiling. This would hang above my head with cable ties on J hooks to improve the overall acoustics within the booth. As soon as we hung it in the booth I noticed an immediate improvement and made sure to send George a new benchmark audio for his review.
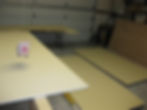
We finished cutting the quiet rock drywall sections for the walls in the garage and then pre-drilled it for easy assembly once upstairs in my studio. Up until this point, I hadn’t really thought about the cosmetic look of the booth, but upon looking at the unfinished pieces, I decided that a coat of paint would add a nice touch. Fortunately, we had an extra gallon if paint in our garage that was the same color as our existing walls that we were able to use. We figured it would be easiest just to pre-paint the drywall in the garage rather than waiting until it was upstairs. Based on my painting skills, this was a good decision! :)

My Dad continued to prep the booth in the garage until we could set aside a day for the big upgrade. He designed a new door for the booth that would completely overlap the door opening by hinging off of the right exterior wall. This would ensure that there would be no gaps for sound to enter. He was also concerned about designing a new handle to open and close the booth door that worked from both the outside and inside at the same time. My current studio design consisted of door latches, one installed on the inside and one on the outside. He was concerned about the lock on the inside and my safety, in the event that something were to happen and I wasn’t able to get out. (Love him for thinking about that one!) The result was one of the most creative door handles I have ever seen, completely customized just for me, and I just absolutely adore it! The door was constructed from quiet rock and insulated, and by the end, weighed about 100 lbs - it was like a vault door! - and required three heavy duty hinges to support it’s weight.
Studio Install

Finally the big day arrived for the install! We needed sheer manpower to move the existing booth, install the exterior walls, move it back into place, and then complete the installation of the inside acoustic panels. My husband joined my father on Saturday morning to help out. Prior to the move, we removed the temporary floor to make it easier to move, as well as strategically place the hockey pucks in place underneath the structure. My father’s solution to move the booth was to set up a series of 1x4’s to slide the booth on, and, with the aid of a rope, pull it out of the corner. Wow - It worked like a charm! With a sense of relief, we secured all four exterior walls and touched up the paint. It was then time to move it back into it’s permanent corner. Considering the ease in which were able to move the booth before the quiet rock install, we didn’t think there would be any problem moving it back. Wrong! The quiet rock walls, at 2.1lbs per square foot, had just added a substantial amount of weight (roughly about 300 lbs!) to the entire structure! My father and husband huffed and puffed, tried all different angles, but just couldn’t budge that booth even one inch! Frantically, I called my neighbor to see if he was available to help. Unfortunately, he wasn’t home and I tried to think of anyone that I could call for help, but I couldn’t get a hold of anyone!

What now? Finally, in frustration, I decided I simply had to get involved and try to help push the booth as well - too much was riding on this day to just give up! Well, somebody must have been watching over us, because having that third person pushing was just what we needed, and the booth literally glided like butter back into place! I am so grateful every time I think about that moment - our family, working together was what really made it successful! It just makes me smile!

Once the booth was in place, we evenly placed hockey pucks under the exterior walls by lifting up the booth at the bottom with a crowbar on each side. Some minor damage was done to the drywall, but nothing a piece of moulding couldn’t cover up. Then we placed the pucks directly on the floor carpeting on the inside of the booth, evenly spaced in order to support the weight of the booth floor. Two layers of plywood and a layer of quiet rock were placed on top of the pucks. The floor framework was then installed on top in three separate sections. The sections were connected to one another and bolted the structure to the side walls, ensuring a fully secured floor for the booth. Insulation in the framing was next, another layer of plywood, and carpeting were added. Our floor was complete, and the entire booth rested atop 31 total hockey pucks to help absorb the sound coming up through the floor. (BTW, we got a great deal on hockey pucks at Hockey Giant in Anaheim!)

Adding the acoustic material to the interior of the booth was next. This was probably one of the easiest tasks of the day as we added sections of the 2” Roxul Rockboard to each of the walls, securing them with screws and washers underneath the existing sound absorption blankets. The mineral wool is super easy to work with and super light - although a bit itchy if you touch it directly! I was quite happy that I would be protected by the heavy duty sound blankets over top of it! Since my booth is not very large, I made sure to step in afterwards to make sure I had enough room to move around! Thank goodness I did! (And this will certainly keep me sticking to my diet!)
The suspended ceiling was hung via simple cable ties to screw eyes that were inserted into the ceiling. Acoustic panels were cut to fit the ceiling frame and were doubled to give a total of 4” of padding above my head.
We mounted the mic boom to the existing shelving that currently housed my equipment. What a difference! I was one very happy girl - no more bulky mic stand taking up all of that room in my booth! Thank you, thank you, thank you George for the suggestion! Such a simple solution, but so incredibly effective! I now had even more room than before and with the added acoustic panels, it was just blissfully quiet in my new environment.
The Best Studio Door Lock Ever!

Mounting the new door was next. As mentioned previously, the door was designed to completely overlap the opening and had to be mounted to the right side wall in order to accomplish this goal. The new door was insulated and made out of the quiet rock, so it was substantially heavier than the previous door, requiring three heavy duty mounting brackets to support it’s weight. Once the door was mounted, the most unique and creative door handle ever invented :) was installed. This took my father the longest to do, as it was totally custom made and couldn’t be finished completely until the door had been mounted, and we could test it’s operation and make any width adjustments that would be necessary. After a few trials and filing of the external shim to make it work easily, we were finished! Seriously, the handle could be my most favorite part of my booth, as I know my father designed it totally out of concern and love, wanting to make sure that there that there would be easy external access to the booth in the event that something were to happen inside. Prior to this, I had a latch that locked on the inside.
We then noticed that there was some daylight coming through the booth once the door was closed. Well, this simply was not acceptable to my father :) so we took another trip to Lowe’s, or was it Home Depot? to get a Wood & Vinyl Clad Foam weather stripping kit, which completely sealed the inside of the door. Worked like a charm! The booth was finally complete! I immediately made a new set of benchmark recordings to send to George, who noted a substantial improvement in both the noise floor and room acoustics.
After that, I decided to spruce up the look of the booth by adding some moulding around the top and door edges. Now it was both super functional and pretty! :)
Thanks, Dad!

My studio upgrade was a wonderful learning experience for both myself and my father, and I am so grateful and thankful to him for believing in me and for helping me to achieve my dreams! And again, many thanks also to the fabulous George Whittam, for all of his invaluable and incredible wisdom and support. My booth stands proudly in my office and represents an ultimate expression of love, heart, and giving. What a beautiful gift it is - it is truly priceless and I am so very very blessed. How fortunate am I, to be able to stand in that booth everyday, and feel love like that?
And thank you, my readers - I hope that in some small way I have been able to help others that may be looking to improve their home studios by sharing my experiences. I’d also love to hear from you - I invite you to share your experiences, comments, and suggestions below. Feel free to check out the rest of my photos from the studio upgrade below:
Additional Photos
Best Regards and Much Success, Anne